Thursday 31 March 2016

Inktense Tutorial part 2

Are you ready play with those lovely Derwent Inktense Pencils again? 

Looking back at the last tutorial I thought that I should mention that Inktense pencils are usually thought of as producing vivid spectacular colours of Indian Ink, and they really do! One of the things that I love so much about them is the way we can immerse ourselves in the joy of using pure, bright colours in our artwork.


But there are lots of fab tutorials on how to get them to release their full colour and it takes a little more practice and thought to use them for subtle blending techniques. It is also good to know that if we have them in our art kit, that they can be used in many ways. This is a slower and more relaxing way of painting which is great for calming the mind.

So lets look at adding some shading and detail to our artwork. 

At this stage I usually start to think about what images or doodles I'd like in my circles. I usually don't fill every space because I sometimes like there to be a calmness of some empty spaces.

In Art, there is as much importance in what we leave out as to what we put into our pieces and negative space, the space between, is a great decorative tool.

As you look at your work so far see if any shapes leap out at you. The green oval shape looked like a leaf to me so I added some veins with a black Pigma Micron pen.


The lines in the paint next to the leaf looked faintly like the petals of a flower so I followed the lines with the pen and made a flower.
There was space for another leaf so I copied the shape of the other leaf, and then there were two! 

Once the shape of the flower is made you can outline it with the pencils and blend the colour inwards. I added a yellow centre to the flower and blended it gently outwards. 


This gives a very subtle natural 'bloom' to the flower. I also added some shade below the flower and leaf to make them look more 3D.
To do this just use a grey or blue and draw a line along the outside of the shape and use a tiny bit of water to blend it into the background. It also disguised the bit where my pencil slipped and gave me a wonky line. I will doodle over it later.

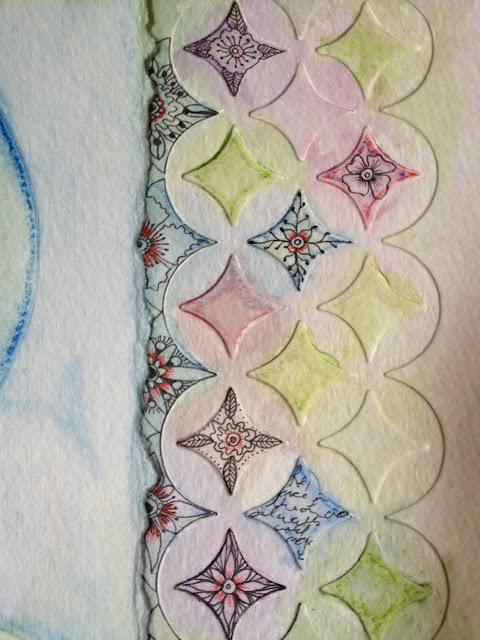
Now lets have a look at adding some detail to the trellis. Last time I drew around the inside of the shaped with the pencils and wet it to soften the colours. Today I started drawing in the spaces.


This photo is very much enlarged to show you the doodles. Anything goes really. The spaces are tiny and you just want to give them some interest. I used the Sakura Pigma Micron pen again for this because it is waterproof when dry and I can go over it with more colour later. I used a 0.1 nib size.

My biggest circle next! 


I have chosen to draw a bird in my largest circle and I think this will become my focal point so I will add the most detail to this. If you don't feel confident to draw freehand, you can stamp an image instead. Remember to use a permanent ink like Stazon so you can add water and pencil over it.


Can you see the difference that shading brings to the image? I outlined the bird and the scallop edging with grey and blended them towards the centre of the circle and it make the image come alive! I added a little more yellow to the bird too.


I also drew tiny spirals around one side of the bird to make it look like it was emerging out of the clouds. Little red details make the image pop and keep it from looking too dark.

I've decided that I don't like that pesky porthole circle below the bird. So I'm going to change it!I've given it a wash of green and yellow. Then whilst it is wet I have drawn a yellow circle in yello and outlined it in Sepia Brown.I have also drawn the petals around it in Sepia.


Then I addad some mor between the petals and blended it.


To finish my daisy I doodled around the edges of the circle and in the centre of the flower.

So that's it! I think I'm done. I have finished by shading around everything to give it a bit of depth.


Next time I will show you some simple techniques for Inktense pencils on fabric. Keep watching.

Tuesday 22 March 2016

Lovin' Inktense and Circles

I had such a lovely time playing with my Inktense pencils and Sizzix shapes yesterday. I thought you might like to see a step by step tutorial on how I painted my little arty thing.


Inktense pencils are like Watercolour pencils. They dissolve easily when water is added to make beautiful blended watercolour effects. How they differ is that these pencils produce stunning vibrant colours, are very soft and blendable and are permanent when dry on both paper and on fabric. it i also possible to get very subtle colours and shadow effects if we use them carefully and we can explore both of those options in this project.

I started with a sheet of watercolour paper which I cut in half.


I ran both pieces through the Sizzix machine with the circles die and then put the circles aside to use another day. I wanted to use just the negative shapes: the bits left behind.
there is a photo of the Sizzix die on a previous post if you'd like to see it.

If you don't have a circle cutter just draw around a cup, a glass etc in 3 different sizes. And cut them out. You don't have to do this with a knife, a pair of scissors will be fine. It doesn't even matter if bits are missing. I cut around the outside edge of one of the pieces and tore around the edge of the other.


With some white glue or a glue stick glue all the pieces in layers onto another piece of watercolour paper making sure that there are some interesting spaces between the shapes.


I've also added a panel from another Sizzix die. I love these for adding some small intricate details to the piece.


Be careful not to let the glue seep through to the front if you can because the pencils wont work over the glue. However you sometimes get interesting effect when this happens, and you will see this on mine I'm sure.

OK, we are ready to start adding the colour! Grab your pencils and a brush and a little pot of water.

I've started with one of the 'holes' at the bottom of the page. I usually stat with a slightly darker colour at the bottom because it 'grounds' the artwork and gives it a bit of weight.
I've drawn around the inside ridge of the circle with Light Olive and Iris blue pencils. The joy of the Inktense is that they blend as you go so we maximize on this by adding more than one colour each time to give us joyous lively colours.


Now I've added water. I have started on the outside and am blending inwards. This gives a lovely shaded 3D effect to our circle. VERY importantly, my brush has very little water on it.
This allows the pencils to dissolve more slowly and blend properly and give a much better result.


Next I did the circle next to it in pinks and purples. I blended that and this time I used the colour that was left on my brush to colour around the circle too. From now on, I am going to use that left over colour to add to my background and dilute it further till all the colour is gone. Each time I have a new colour it will add to the rainbow effect.


I want to show you a slightly different way to add blended colour  now. This time we are going to start with one colour in the middle and another around the edge.


Then we start blending from the inside out!


It's coming together isn't it? If you keep to a colour scheme it will all look harmonious. Mine are all in the pink and purple family with accents of green and yellow.

Now for the little lacy panel...


So that's it so far. The basic colouring is done. On the next blog post I will show you how to add shadows and details.


Monday 21 March 2016

Inktense and Circles

Two of my favourite artsy things! Derwent Inktense pencils and circular motifs and shapes.

Today  I have been chillin' after a busy weekend and have just been playing with the negative circle shapes that have been cut from watercolour paper and Derwent Intense pencils.     

I will do a tutorial about how I did this tomorrow if you would like to follow along and have a try but for now, here is my doodlin'.


Inspired by Lichen and colour

Lichen inspires me! There are tiny worlds amongst the damp tendrils. Tiny flowers, shapes, textures and surprising bright colours.


This little piece of embroidery in progress has tiny crochet cups made with hand dyed silk thread. They have been sewn onto space dyed silk scrim which has been layered onto a piece of silk and merino Nuno felt. I have used the same thread to hand embroider french knots and feather stitches and there is a woven wheel on there too.

Monday 7 March 2016

Silk Magic!

Last Saturday we had a day of experiencing Silk!

This was also at the Hertfordshire Embroiderers Guild. We had a whole day of playing with silk in lots of it's different forms; chiffon, dupion, organza, silk rods, silk tops, strippings, throwsters waste etc.

We bonded, shredded, ironed, collaged and stitched and the results were wonderful.

Here are some photos to show you the beauty and lustre that is SILK!


This first one is bonded, collaged with scraps of different kinds of silk fabric and stitched with hand dyed silk thread.


A silk collage onto vintage wool with shredded silk fibre and merino felt. Stitched with hand dyed silk floss.


Work in progress, above, to show how the patterns are built.

The photos below are all work in progress made during the day. Aren't they fab?


This one is drawn and painted onto fabric, cut and applied.


Easy Silk flowers! Made with Silk Organza with a wool centre.


Needle felting the fibres to make delightful textured backgrounds.


The one above has had drawn and painted details


 Shredded and Needle felted fabric and fibres. 


Flowers, flowers, flowers!


simple, sweet and stitchy


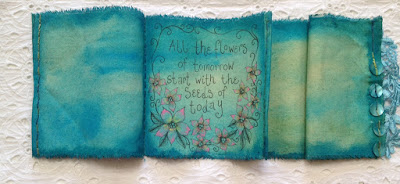
A little Fabric Concertina book

On Saturday I will be teaching a workshop for the Hertfordsire branch of the Embroiderers Guild JETS group.

These Junior Embroiderers and Textile Artists meet a few times a year and are a wonderful group of young people who have learned over their time at the EG to try all kinds of textile techniques and experiments with stitch. 


The youngsters of today are the future of our skills and craft and it is a joy to teach them.


We will be experimenting with painting techniques on fabric and embellishing with stitch, print, text and collage.


Sounds like a fun day doesn't it? Can't wait to get painty!