Monday 12 December 2016

Families Learning Together!

I have loved teaching Art Journalling in schools this term.


The workshops have been part of the programme of Family Learning and have been designed to teach children and their adults and carers to explore, together, art techniques, relaxation strategies and the use of their imaginations to create wonderful journals full of their own ideas and designs.

I really wanted to teach this in a way that will make their journalling a lifelong habit. Hopefully a passion. A place to go for quiet, where they can find peace and solace in a crazy world. This new generation are going to need strategies to help them cope with the pressures that their life will present. 
We adults desperately need it too!


The  way that children and adults learn together is so valuable because whilst they are sharing the closeness of an enjoyable learning experience they often each approach it in a different way, with their own styles and talents. 

They learn a great deal from one another and an appreciation of the others skills. I have seen family members look at one another with fresh eyes! Issues have been discussed, support given and friendships made. All whilst they are making art!


It gives families a new hobby to enjoy together. I feel this is essential in a time when children are often isolated within their own minds, playing or learning on gadgets and technology that only involve one person. Parents too, are so stretched and stressed that finding time to relax as a family is sometimes very difficult. And yet, we are not meant to be solitary beings. We sometimes have to re-learn to be together. And how to share.


The lifelong learning outcomes have been so exciting. 
Some of the children have changed their Christmas lists to Santa! They have asked for art materials instead of gadgets and games. Their parents are amazed! 


The adults have made their own lists! They have found the relaxation and thrill of journalling is addictive and just don't want to stop! 


And they have all enjoyed doing the shared activity so much that they think they will approach the New Year with a new way of spending family time together. I'm so thrilled! I really am!


As an added bonus, this year I have had families in my workshops who last had the opportunity to work with me up to 4 years ago. They are still doing the activities they learned all that time ago and brought their work to show me. This has shown me that this kind of learning lasts. Long may it last.


I LOVE my job!!


Sunday 11 December 2016

Dancing Fairies

I think I'm addicted to Inktense pencils. I've been playing with them a lot! I've been teaching using them in Art Journals so they are always in my bag. They suit so many styles of colouring and artwork and are so easy to use.

Next year I'm doing a workshop on Whimsical Illustration so I thought I'd show you a little drawing I did lately. A Dancing Fairy.


She started out as a black and white drawing. I wanted an image that was like a paper doll that I could experiment with, cut out and resize. So here is what I did with her.

I resized her to a tiny size and copied the image 9 times. I thought I'd have them dancing in a circle. When I put them on the page the legs were curling up a little bit so I decided to leave them unglued to add to the dancing effect.


There was the space for a flower in the middle and between the fairies so I cut it out and coloured the background with the pencils, keeping the colours  light and fading into one another.

I've been experimenting a lot with holes in my pages and letting them show through  to interesting things on the following pages.

Soooo... On the next page is this!


And this!


At the top of the page is the fairy at full size, about 4 inches tall and coloured in. Its good fun to try to get extra uses out of your drawings and doodles especially if they take a long time to do. 
Give it a go and let me know how you get on. 


Thursday 24 November 2016

Oops! Inktense Part 3!

I've been teaching drawing and colouring with Inktense pencils this week. Every time I do, I am reminded that these are such a lovely product. I just love 'em!

They are so easy and effective to use with just a few top tips to make the effects extra special.

It reminded me that back in March I added two tutorials on this blog for using them and promised a third one. Life got so busy and I forgot to do it.

Part 3 was going to be about using these amazing, versatile pencils on fabric. Here it is...


It is a little known feature of Derwent Inktense pencils that when they are dry they become permanent. This makes them fab to use to colour fabric. 

Some artists use Fabric Medium to wet the pencils and it is great to experiment with this and see if it gives extra fastness but I have always just used water to fix mine.

The colours are also translucent which means you can layer them. This means that you can keep adding colour and blending it to make lovely watercolur effects.

Step one: I used a vintage doily and drew one of my  little crazy birds onto it. I probably used a 0.2 size Pigma Micron pen for this because it is permanent and can draw fine detail without the nib being ruined on the textured fabric, if it is used carefully.


I will have some workshops coming up soon,  in 2017 on Whimsical Illustration

Let me know if you are interested in these because lots of people have been asking about these and I think places may go quite quickly.

I then embroidered over the lines and details using 21st Century Yarns hand dyed thread. Then it was time to play with the pencils!

I drew around the embroidered contours on the doily with the pencils. I used 2 colours because I love the way they mix to give a blended watercolour effect. Here is a closer look.
Click on the photos to get a larger and closer look.


Then I added the water. Here is the most important bit......
VERY LITTLE WATER!
This gives you much more control over the dissolving the pigment and spreads it only as far as you want it to go.
As soon as the area you have been working on is dry, it is fixed and you can add more colour if you like.

The area on the right of the photo above shows the effect with the water added.

I will probably leave it like this now. Sometimes, you just need a little bit of colour to zizz up a thingy! Finished!


These would be fabulous to decorate one of the pages in a 


Fabric Book. 

Workshop coming up in February for making these and I will probably include this technique in that action packed day.

Have a go! I'd love to know if you do and what you think.

PS. Try colouring on Satin ribbons and on threads too.

Thursday 17 November 2016

Workshop details for Chesham at last!

11th February:  Mixed Media Fabric Art books. £65

Using hand painted Calico and mixed media we will make a handmade fabric book with textile pages and pockets. There may be opportunities to continue learning additional techniques throughout the year to add to your skills and the beauty of your book.


11th March: Scrap Stitching £65

We will use hand embroidery techniques with treasured scraps of textiles, silk and vintage embellishments to make a little picture with exquisite details. Later in the year, in June, there will be a chance to learn a different set of techniques with rust dyed fabrics.


8th April: Blanket Books £65

We will use vintage wool blankets, wool fibre and hand embroidery to make Folk Art inspired treasure book.

May 13th: Vintage Inspired Mini Quilts £65

We will use some fantastic vintage resources like antique lace, pearl and linen buttons, precious found objects and vintage photos to learn how to make tiny  hand embroidered fabric 'Quilts'. You will be able to take these home finished, to be framed or use them in a future textile project. You could also use them as pages in your Fabric Books if you are working on one of these with me.


10th June: Scrap Stitch 2. £65

We will use precious scraps of vintage fabrics and previously rust dyed fabrics with hand embroidery to make an exquisite textile panel.


8th July: Folk Art Needle felted and hand embroidered picture. £65

We will needle felt and embroider a Folk Art inspired picture onto vintage wool blanket using merino wool fibre and hand dyed, silk and wool threads.


13th and 14th October: 2 Day workshop. Altered Books. £150

This is a 2 day workshop which will introduce the subject of Altered Books from scratch and advance into adding doors with real hinges, niches and decorative 3D elements. The 2 days are packed full of mixed media materials and techniques. You will leave with lots of ideas to continue your adventures with Altered Books.

To book a place please email Paula at: paula@paulawatkins.co.uk


Saturday 12 November 2016

A time for gathering

Autumn is such a beautiful time isn't it? 

I really want to capture it; the astonishing changes in colour, the crisp chilled air. Artists have always tried to capture the colours and feelings of the season.

For me, I also want to capture the textures. Crunching through the leaves, the rustling of the trees...


When I was a little girl I used to try saving the beautifully colourful leaves or sticking them in a scrapbook but they always fell apart or continued drying till they became brown and brittle.

I know how to do it now!

You need to gather the leaves before they are brittle. At the beginning, when they have lots of colour and are still flexible is the perfect time to add them to our sketchbooks and preserve them for a long, long time. These are about 6 years old and they are in one of my sketchbooks that have been looked at by hundreds of people.

Here is how to do it. PVA glue! also known as White Glue.

This is an adhesive that is made acrylic. A kind of plastic and if we coat our leaves well enough it encases them and will stop them deteriorating. 


These pieces of Bracken Fern were picked while they were still flexible. On a piece of non stick paper I coated the back and front with the glue making sure I coated every little nook and cranny.

I painted my sketchbook page with a base colour and when it was dry, coated it with PVA glue and laid the fern onto it. I added more glue and pressed it into the fern so it becomes fully embedded.

When it is fully dry you can add colour by watering down paints and trickling them between the spaces in the leaves.


Now you can capture a little piece of Autumn colour for yourself. Go out for a lovely walk and see what beautifully shaped leaves you can find.


Monday 19 September 2016

Felt! I've missed you!

I've had such a lovely time this weekend making and embroidering on Handmade felt. I ferreted around to find as many lovely textured bits to add to the layers and found little scraps of silk organza, recycled sari fibre, hand dyed scrim, and silk throwsters waste.

Look what happened! Felt is magic!


I embroidered it with number 5 perle WonderFil Eleganza threads. They are variegated colours and matched my felt so well. A few people have asked about the background under the felt. Its a page in my sketchbook where I've been playing with weathered and worn textures.

Monday 29 August 2016

Fish Talk!

Its been so lovely to have a day to myself just getting back in touch with my pen!

I love trying different media and get so excited about combining them but sometimes the simplicity of just a pen and paper and time to doodle are are one of life's little luxuries.


I can't get enough of looking at Fish and trying to capture their lovely sleek scales and the infinite forms of their shapes and colours. The more you look, the more you see all kinds of repeating patterns and the more we observe the details the better we get at drawing. 

The section below shows the repeating patterns and the lines that give the fish its structure and shading. This is the fish before I cut it out.


The collaged page is in my Fishy Sketchbook. A whole book of fishy moments! It's good to return to it when I need a fishy fix!

Saturday 27 August 2016

Moon Child

We have had some beautiful Summer evenings lately here in the UK. Summer has arrived at last and at the end of the day when everything is quiet even our rather scruffy garden looks so lovely in the moonlight! 

There is usually a soft breeze which sways the branches of the trees and the shamefully overgrown grass and the large golden Harvest Moon makes everything looks magical.

I wanted to capture the way that the moonlight shines in cool, silvery slivers on everything it touches, only just highlighting the textures of nature and making us imagine the shapes still in shadow.


I'm not very good at drawing faces. I usually avoid them and draw something else instead. But as I usually encourage my students to be fearless I thought I'd take my own advice and try painting a moonlit face on a black background.

I started with a wash of black acrylic on watercolour paper followed by a wash of metallic gold and bronze to give a bit of shimmer.

Then I painted the face with a wash of thinned white. I wanted the darkness to provide the shadows. The rest of the paper was filled with plant shapes in the same wash of white. The brush still had a bit of gold on it so there are yellowy hints in there too.


I then had a lovely time back in my comfort zone, with my trusty white pen, doodling in all the moonlit highlights. 

I'm quite pleased with it! I like the way the gold peeks through the white wash to give it some depth and just a little bit of shimmer.

Here is a close up of the eye so you can get a better look at the layers. 


Saturday 28 May 2016

Amazing Rust!

Just a quickie look at today's rust. I am so pleased with these. They are so clearly printed that it looks like the rusty washers are still on the surface.


On thick cartridge paper. 


On thick cartridge paper. It looks so like the metal.


On cartridge paper with organza and modern cotton lace.


Cartridge paper again.


On a vintage hankie with a lace edging.


On fine linen scrim and vintage lace. So fabulously crunchy!
On cotton in the background.

Wednesday 25 May 2016

Fabulous Felt coming soon!


Don't you just love the textures in Handmade Felt? 


Especially when all sorts of lovely fibres are added into the layers  so they form their own little serendipity of colour just like a wildflower garden.
This one has added stitch and beading on the surface.
Do you fancy joining me to make one of your own?

More Rust! Textures!

Doesn't rust look lovely on textured fabric. These are on damaged vintage Broderie Anglais and a variety of other gorgeous embroidered fabrics and although it seems so sad, in  some ways, to distress them, they have been rescued from a charity shop and will become glorious again in a new artwork. 


I am so thrilled at the variegated greys in the dyeing, and hardly any orangey rust colours. I think the tannin in the tea was responsible for this happening because I dyed them with just tea and no vinegar at all. I love too that the circles from the washers have printed so well. 


Wednesday 11 May 2016

Fab Rust!

Today I was supposed to be doing a bit of Spring cleaning but instead I have been playing with rust. 

4 days ago I started some rust printing in the garden and today it is ready. So fast! and always such a lovely surprise.

This is the fabric when I had rinsed and dried it. I used pieces of cotton. Most were recycled. One was a piece of lovely tightly woven shirting and it feels almost silky. 


Another was part of a torn blouse with lace inserts.


This one is a piece of some lovely linen scrim that I got in France.


What always amazes me is that the prints are almost photographic. You can see so clearly the shapes of the rusty square and circle washers.

Want to know how I did it? It is so simple and quick!

I placed half a piece of fabric in the bottom of a tray, covered it with lots of rusty washers and folded it over. Then I added more layers of fabric and more rusty stuff. I poured tea over it and put the whole thing in a plastic bag and left it in the garden for 4 days.

Below is the piece that I folded over at the bottom of the pile. It has printed with a mirror image of the rusty bits. Magic!


Thursday 31 March 2016

Inktense Tutorial part 2

Are you ready play with those lovely Derwent Inktense Pencils again? 

Looking back at the last tutorial I thought that I should mention that Inktense pencils are usually thought of as producing vivid spectacular colours of Indian Ink, and they really do! One of the things that I love so much about them is the way we can immerse ourselves in the joy of using pure, bright colours in our artwork.


But there are lots of fab tutorials on how to get them to release their full colour and it takes a little more practice and thought to use them for subtle blending techniques. It is also good to know that if we have them in our art kit, that they can be used in many ways. This is a slower and more relaxing way of painting which is great for calming the mind.

So lets look at adding some shading and detail to our artwork. 

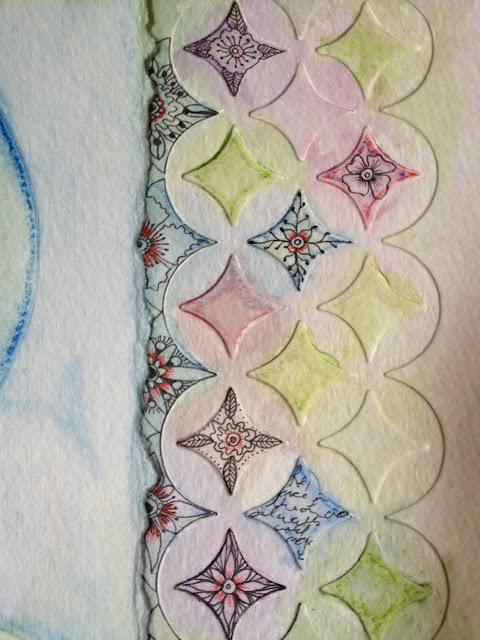
At this stage I usually start to think about what images or doodles I'd like in my circles. I usually don't fill every space because I sometimes like there to be a calmness of some empty spaces.

In Art, there is as much importance in what we leave out as to what we put into our pieces and negative space, the space between, is a great decorative tool.

As you look at your work so far see if any shapes leap out at you. The green oval shape looked like a leaf to me so I added some veins with a black Pigma Micron pen.


The lines in the paint next to the leaf looked faintly like the petals of a flower so I followed the lines with the pen and made a flower.
There was space for another leaf so I copied the shape of the other leaf, and then there were two! 

Once the shape of the flower is made you can outline it with the pencils and blend the colour inwards. I added a yellow centre to the flower and blended it gently outwards. 


This gives a very subtle natural 'bloom' to the flower. I also added some shade below the flower and leaf to make them look more 3D.
To do this just use a grey or blue and draw a line along the outside of the shape and use a tiny bit of water to blend it into the background. It also disguised the bit where my pencil slipped and gave me a wonky line. I will doodle over it later.

Now lets have a look at adding some detail to the trellis. Last time I drew around the inside of the shaped with the pencils and wet it to soften the colours. Today I started drawing in the spaces.


This photo is very much enlarged to show you the doodles. Anything goes really. The spaces are tiny and you just want to give them some interest. I used the Sakura Pigma Micron pen again for this because it is waterproof when dry and I can go over it with more colour later. I used a 0.1 nib size.

My biggest circle next! 


I have chosen to draw a bird in my largest circle and I think this will become my focal point so I will add the most detail to this. If you don't feel confident to draw freehand, you can stamp an image instead. Remember to use a permanent ink like Stazon so you can add water and pencil over it.


Can you see the difference that shading brings to the image? I outlined the bird and the scallop edging with grey and blended them towards the centre of the circle and it make the image come alive! I added a little more yellow to the bird too.


I also drew tiny spirals around one side of the bird to make it look like it was emerging out of the clouds. Little red details make the image pop and keep it from looking too dark.

I've decided that I don't like that pesky porthole circle below the bird. So I'm going to change it!I've given it a wash of green and yellow. Then whilst it is wet I have drawn a yellow circle in yello and outlined it in Sepia Brown.I have also drawn the petals around it in Sepia.


Then I addad some mor between the petals and blended it.


To finish my daisy I doodled around the edges of the circle and in the centre of the flower.

So that's it! I think I'm done. I have finished by shading around everything to give it a bit of depth.


Next time I will show you some simple techniques for Inktense pencils on fabric. Keep watching.